
At Remolque.es, we deliver hundreds of platforms every year to brotherhoods, clubs, city councils, and festival committees that are embarking on their first parade float project. The same question almost always arises: "We want to build our first float, where do we start?" This guide compiles what we've learned working with these teams. It's not theory: these are the steps, mistakes, and figures we encounter on the ground.
You will read the complete sequence from idea to parade, with specific data on weight, permits, and budget. We will also provide a real comparison of the types of trailers that can serve as a base, with the advantages and pitfalls of each. At the end, you'll find the questions we are asked again and again, and a checklist you can download.
Before starting: the 4 decisions that determine the entire project
A poorly planned parade float project is noticeable in the parade itself. The scenery doesn't fit under an arch, the towing vehicle can't legally tow it, the float ends up costing double the budget, or rust appears on the base in the second year. 90% of these problems stem from not having finalized four initial decisions.
Event. A Three Kings' Day parade is not the same as a Carnival procession or a patron saint festival float. Each event has its own municipal ordinance, its specific route with obstacles (cabling, branches, archways), and its duration. Before any design, consult the organizing city council about the maximum permitted dimensions and safety requirements.
Float size. A typical Three Kings' Day parade float measures 4-6 meters long, 2.20 m wide, and does not exceed 4 m in total height with decoration. Within these limits, 6-10 participants can be comfortably accommodated. Andalusian Carnival floats are lower and longer. Pilgrimage floats rarely exceed 3 m in width.
Budget. Building a float from scratch costs between €4,000 and €12,000 in the first 12 months, depending on size and finish level. Most of this goes to the approved platform and the decorative structure. If the project is intended to be recurrent, it is advisable to prioritize the base (lasts 15-20 years) over the decoration (which is remade almost every edition).
Driving license. This is the point that causes the most surprises. With a B license, you can tow platforms up to 750 kg maximum authorized mass, or when the sum of the MMA of the towing vehicle and the trailer does not exceed 3,500 kg. Above that, you need a B+E license. We have encountered clubs that discover two weeks before the parade that no one on their team can legally drive their own float.
With these four decisions finalized, the rest of the project becomes execution.
Which trailer to choose for your float: a complete comparison
The base of the parade float trailer is the most expensive decision to reverse. Changing the decoration from one year to the next costs €1,500. Changing the trailer costs €4,000 and months of paperwork. These are the five real market options, with what each offers and what complications it might present.
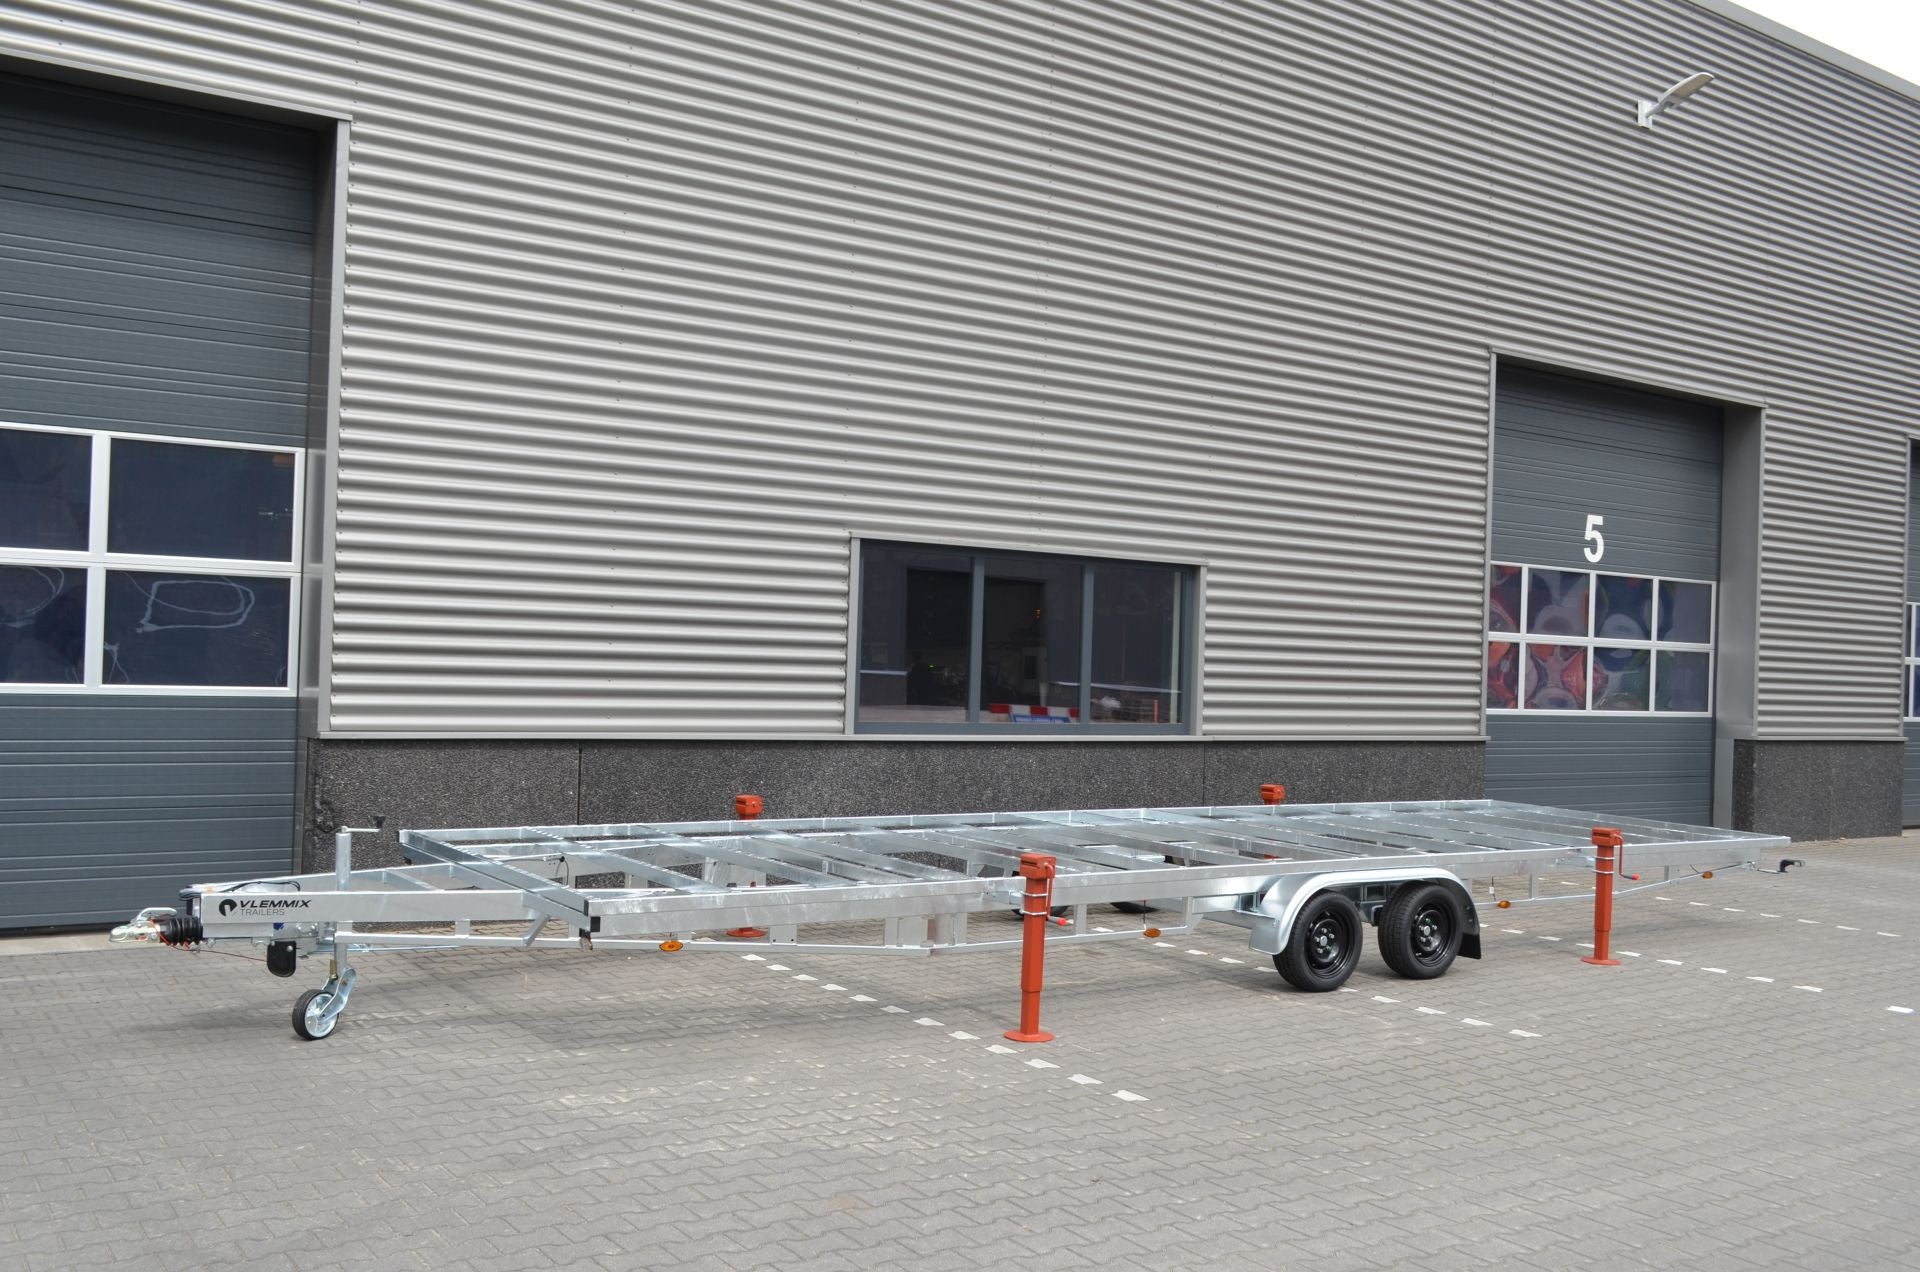
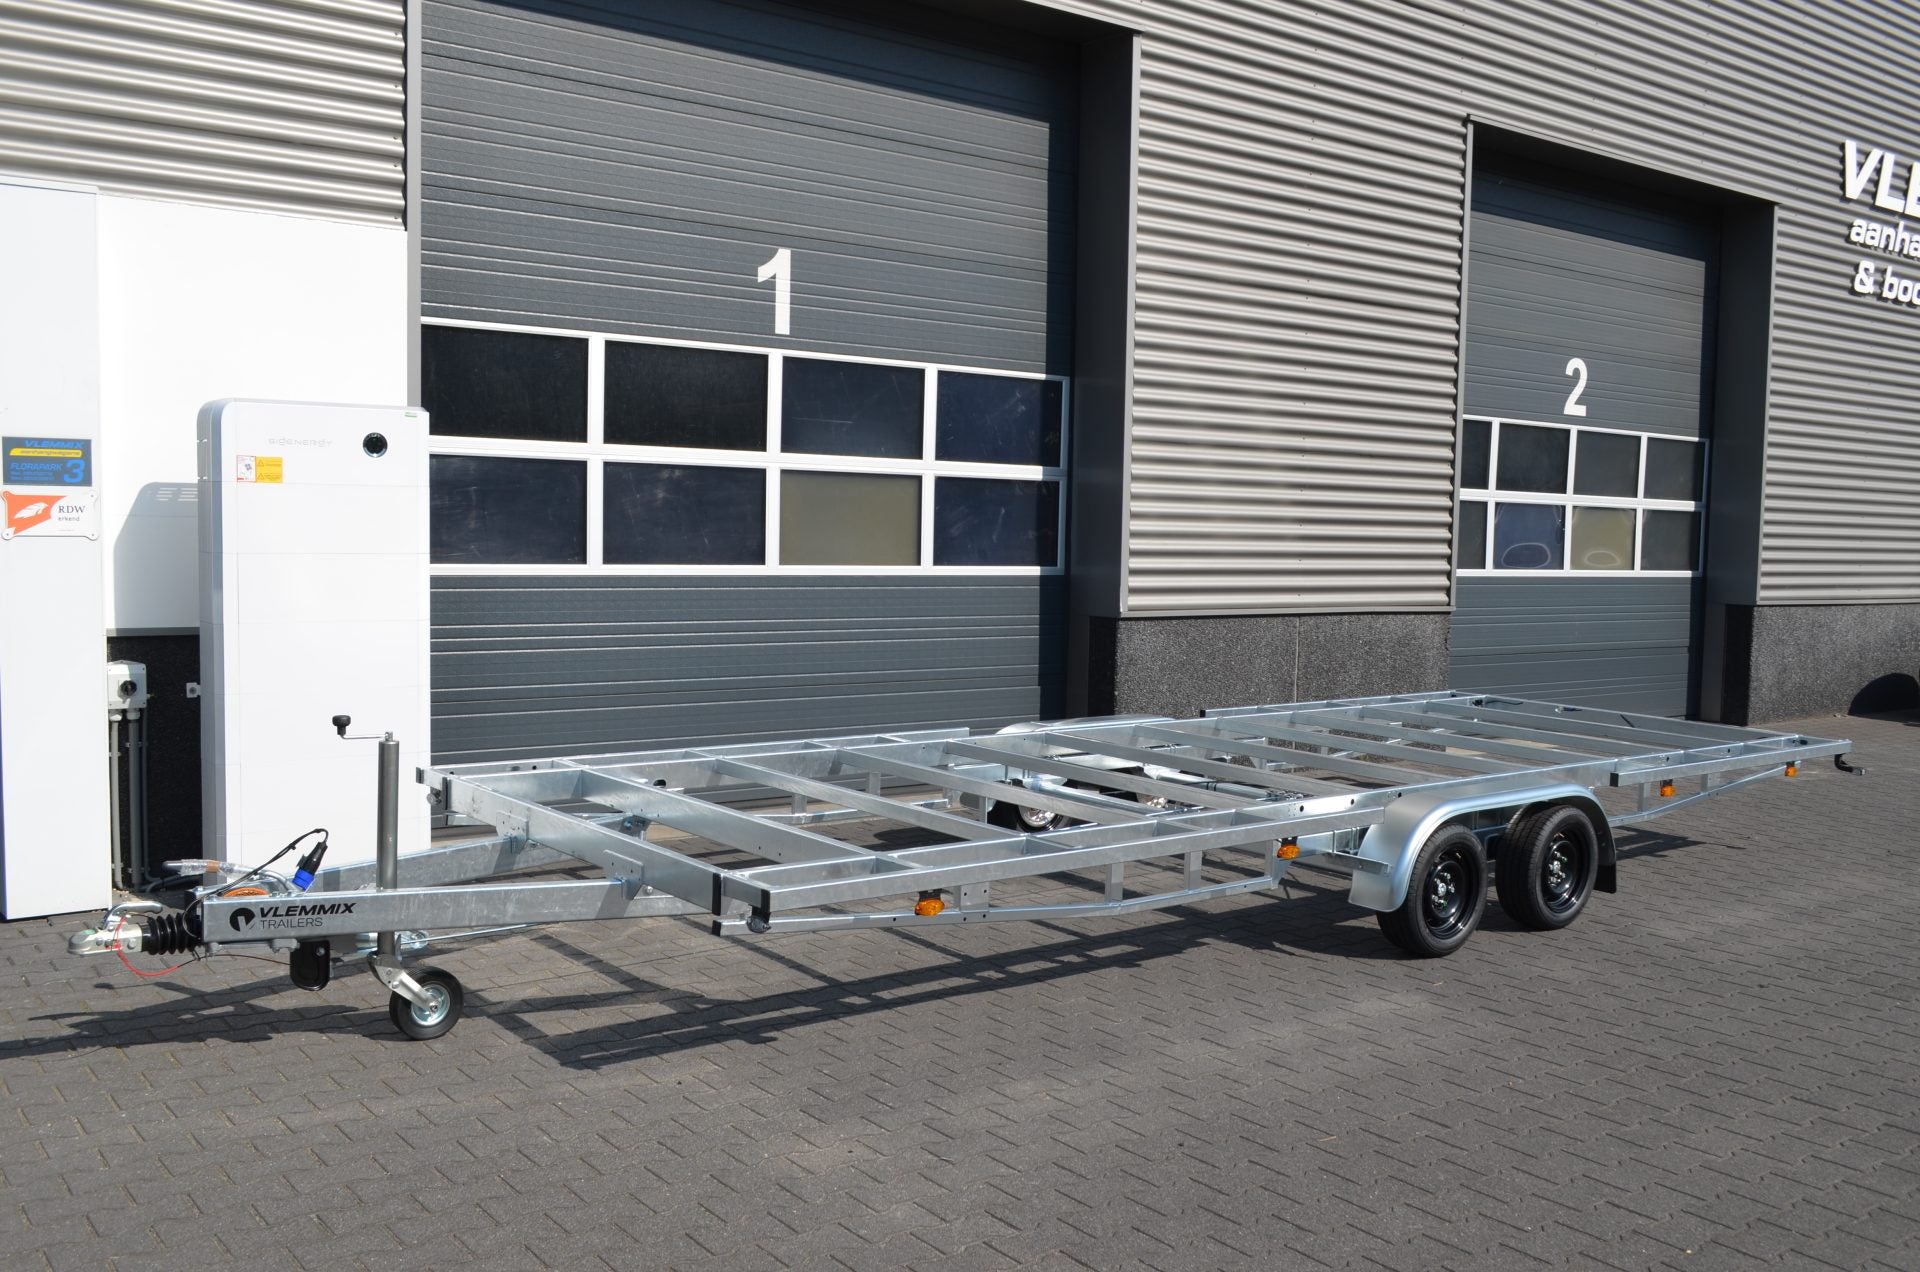
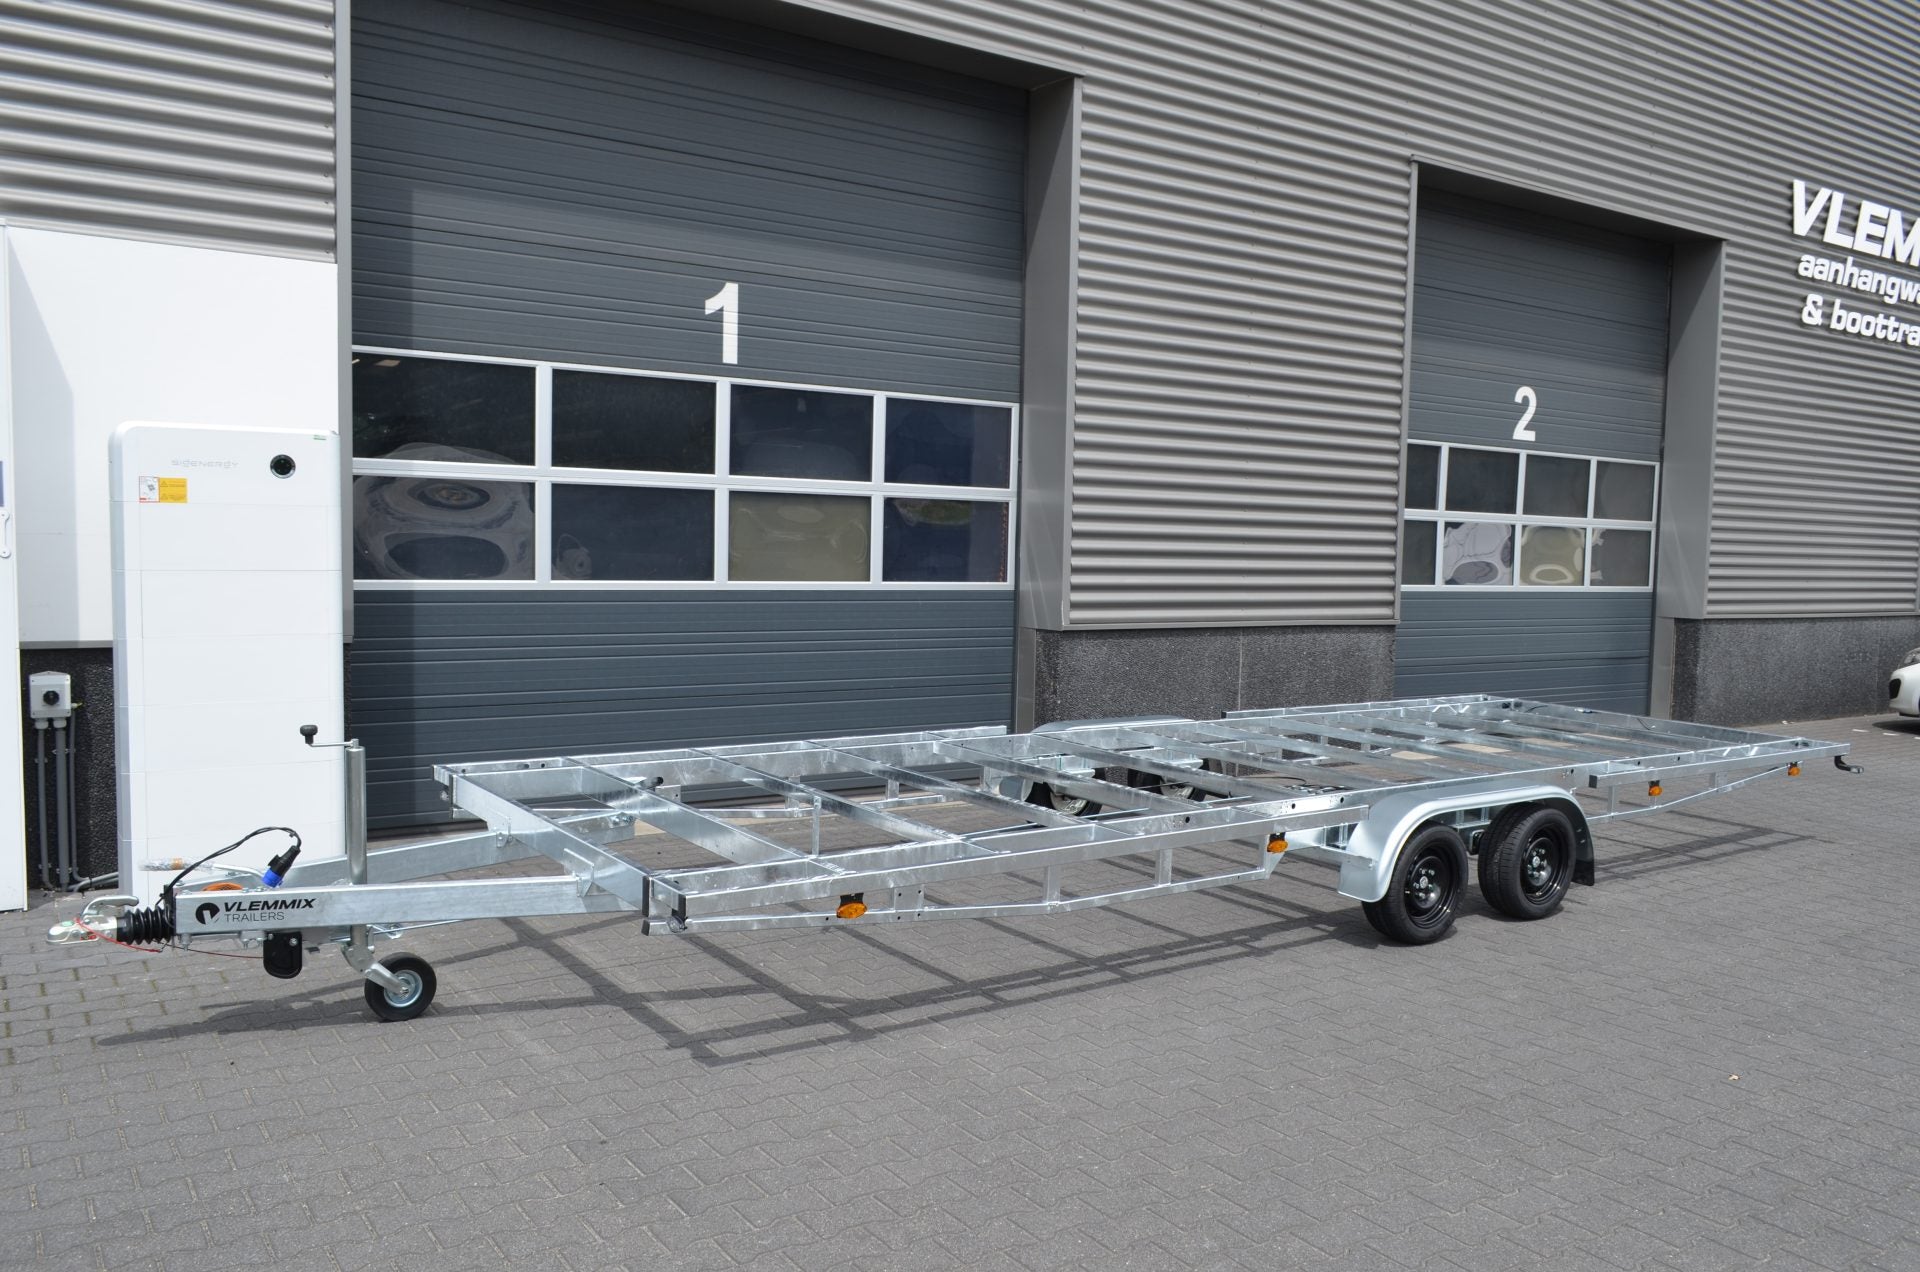
Approved flatbed platform
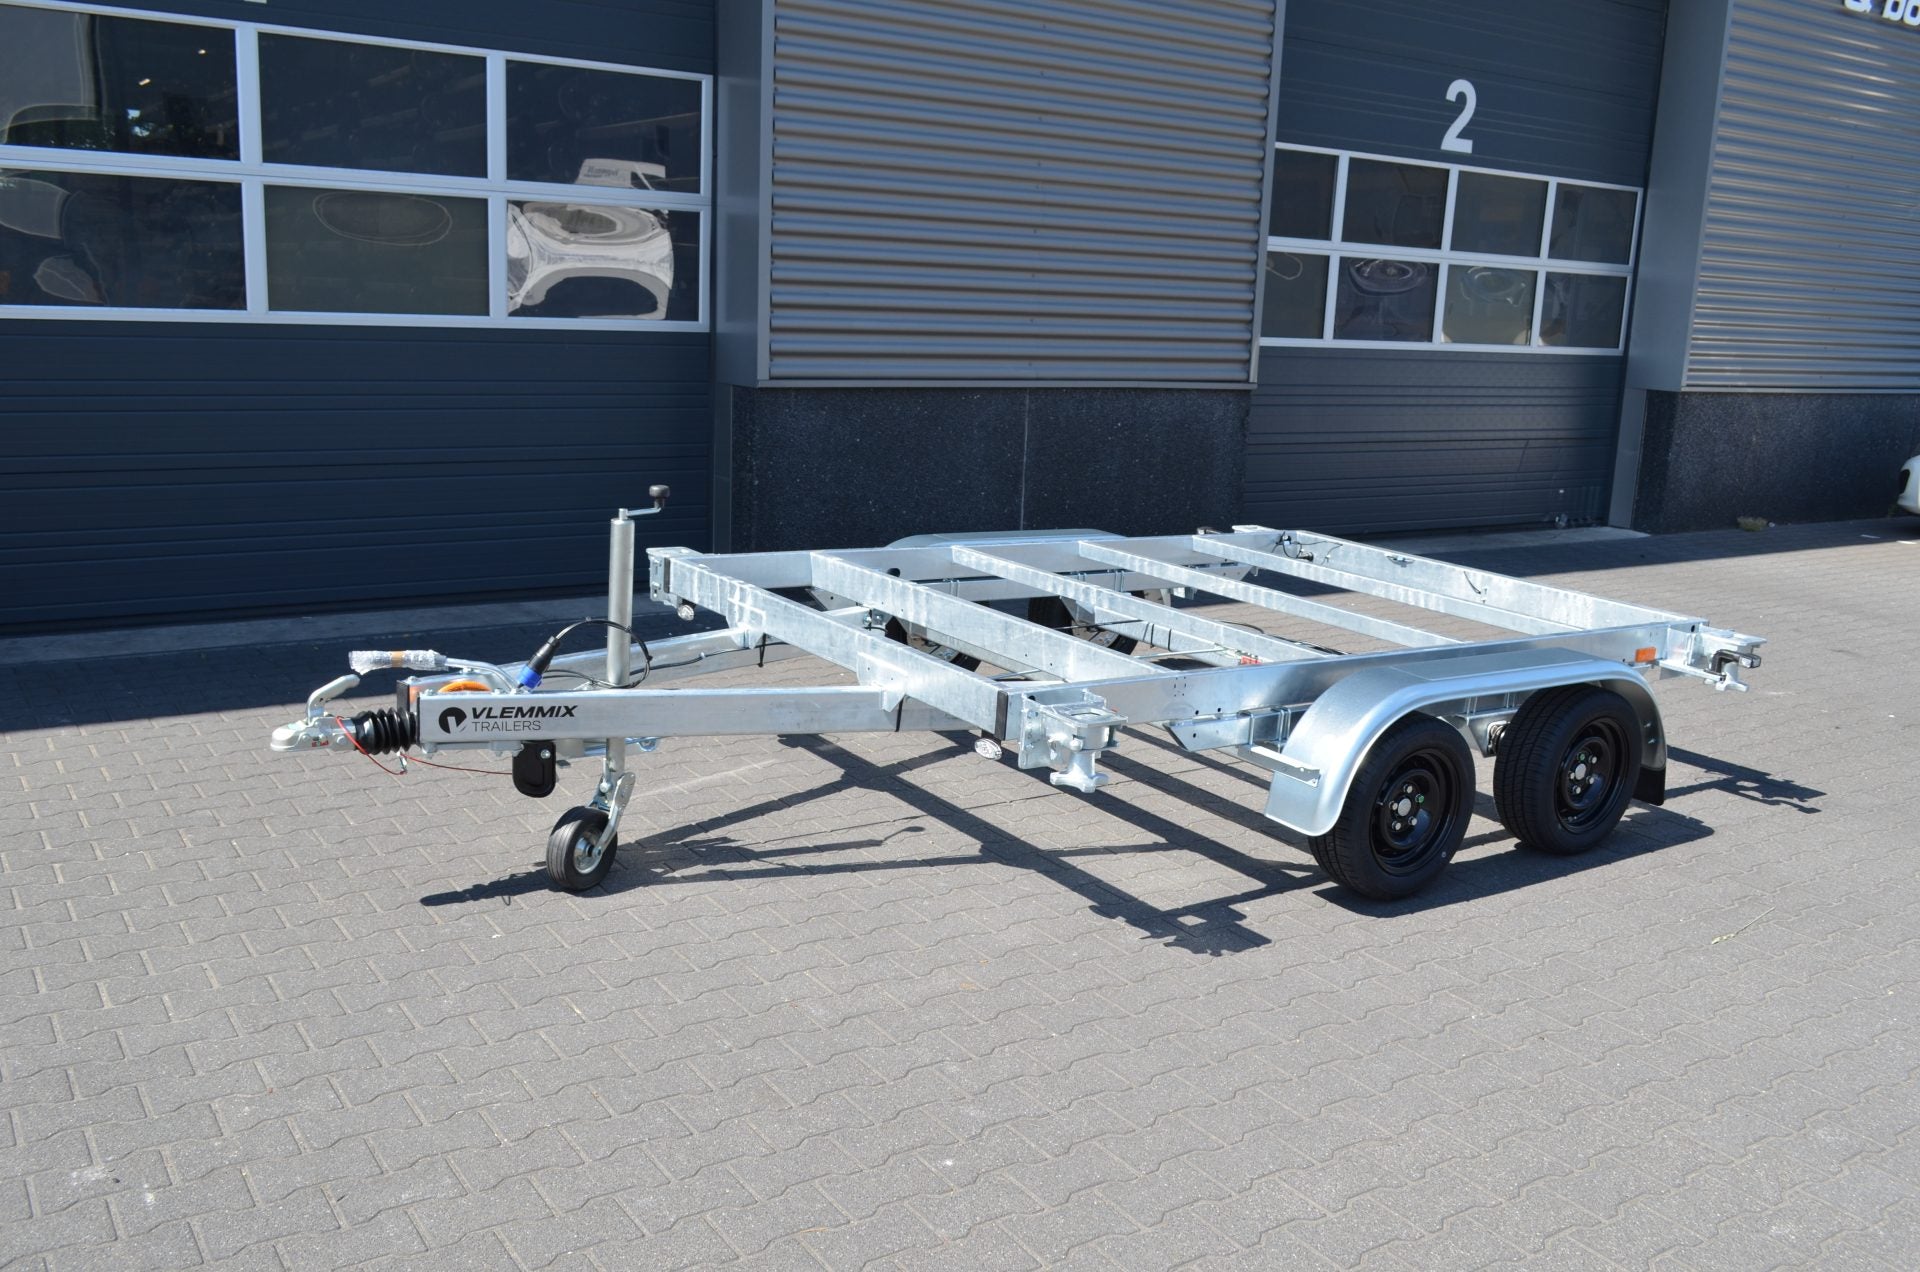
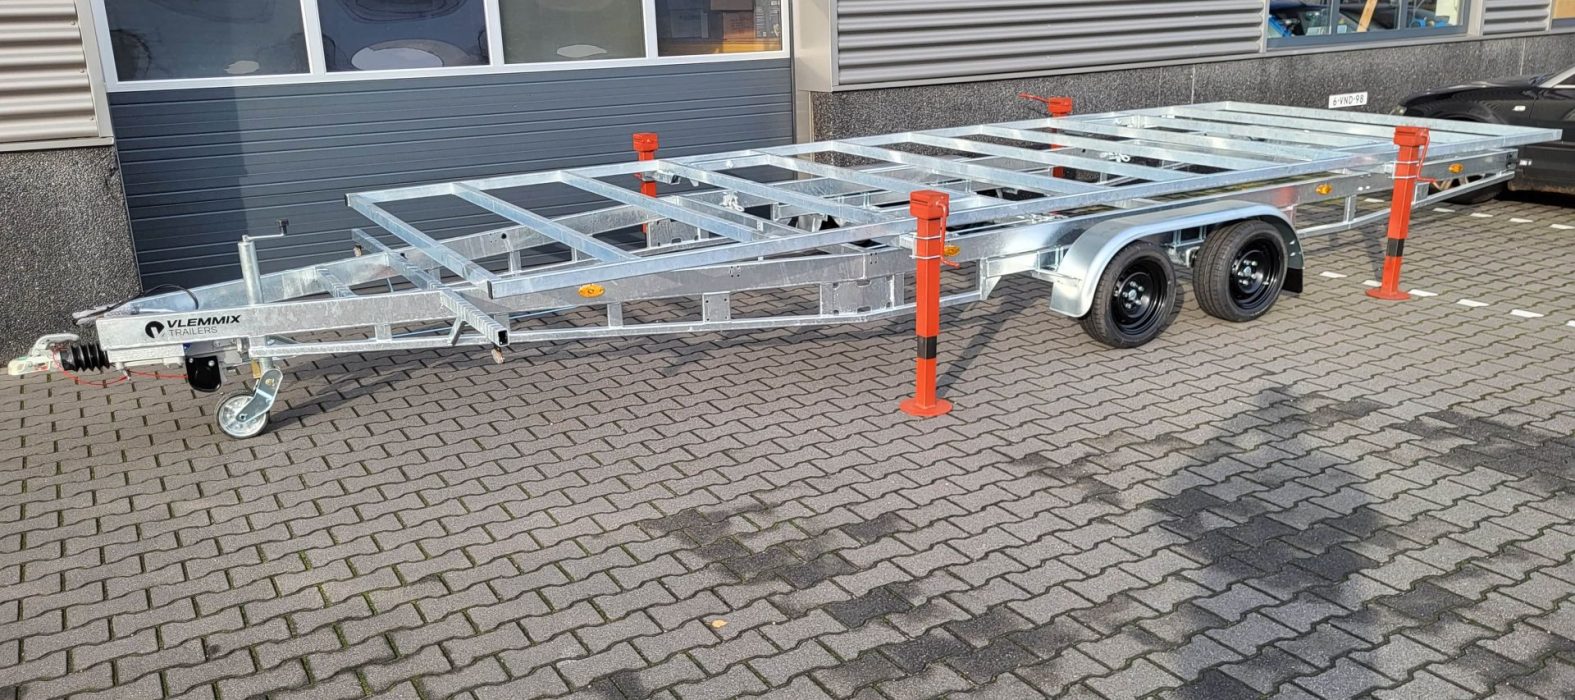
Continuous base without sides, with a galvanized chassis, standard measurements from 2 to 7 meters, and configurable PTAC (total authorized load) up to 3,500 kg. This is the most versatile option for parades because the clear floor allows any decorative structure to be mounted on top (raised platform, figures, stage). It is delivered registered, with a technical data sheet and up-to-date ITV (vehicle inspection). At Remolque.es, the 6-meter model weighs 570 kg unladen, between 80 and 330 kg less than typical Spanish competitors, which frees up payload for participants and scenery.
When it fits: projects that repeat year after year, floats with large decorations, associations that want a durable, guaranteed base.
Limitations: without sides, custom railings must be installed to comply with municipal ordinances.
Demountable platform
Same flat base but with removable sides of 30-40 cm. The advantage is its dual use: in January, it transports a float; the rest of the year, it moves materials, event furniture, party chairs, or fair decorations. For a club or committee with several events a year, it's the fastest way to amortize the initial investment.
When it fits: organizations with a tight budget that need the trailer to work all year round, not just for the parade.
Limitations: 30-50 kg heavier unladen than the strict flatbed, a minor detail unless MMA is very tight.
Classic trailer with fixed sides
The classic cargo trailer with high sides (60-80 cm) and a rear door. Some clubs use it as a float because the side already acts as a "railing." It works for small floats with few participants and low decorations.
When it fits: simple floats for patron saint festivals, short pilgrimages, school parades.
Limitations: the fixed side complicates mounting tall structures and pushes the decoration upwards. It is not the best base for a large parade float.
Custom trailer
A regional workshop builds the base from scratch according to your plans. Costs range from €6,000 to €15,000, lead times from 2 to 4 months, and total dependence on the workshop for future modifications.
When it fits: floats with impossible geometries (more than 7 m long, articulated multi-level, special machining). Probably 5% of real projects.
Limitations: most projects do not require custom work. Many workshops charge "custom" for what is actually a standard configuration with cosmetic changes. Always verify if your real need is not covered by a standard approved platform at half the price.
Second-hand trailer
Milanuncios and Wallapop are full of them. A trailer appears for €1,500 and seems irresistible. Until you discover that the ITV (vehicle inspection) has expired, the galvanization is rotten, the brakes are unresponsive, or the chassis has unapproved welds. A technical inspection in November leaves your January parade without a base and no time to react.
When it fits: almost never. Only if you can go with a trusted mechanic to check it on-site before buying, verify complete documents in the seller's name, and factor in the ITV and tuning into the real price.
Limitations: high risk. What you save on purchase goes into repairs and paperwork.
Decision comparison
|
Trailer type |
Price (6 m) |
Lead time |
Durability |
Flexibility |
Risk |
|---|---|---|---|---|---|
|
Approved flatbed platform |
€4,500-€5,500 |
1-3 weeks |
15-20 years |
High |
Low |
|
Demountable platform |
€5,000-€6,200 |
2-4 weeks |
15-20 years |
Very High |
Low |
|
Classic trailer with sides |
€3,500-€4,500 |
1-3 weeks |
15-20 years |
Medium |
Low |
|
Custom trailer |
€6,000-€15,000 |
2-4 months |
10-15 years |
Medium |
Medium |
|
Second-hand |
€1,000-€3,000 |
Immediate |
Uncertain |
Variable |
High |
The approved flatbed or demountable platform covers 90% of the parade float projects that come our way. The rest usually benefit from a classic trailer with sides or, in very specific cases, a custom-made version.
Step 1: Define the design and structure of the float
With the base decision already made, the next block is creative. Before buying a single screw, define three elements on paper.
The theme. Three Kings requires a narrative line (adoration, pageboy, star, camel). Carnival allows almost any concept: movie themes, political satire, musical tributes. Patron saint festivals usually refer to the local saint, traditional craft, or town history. Choose a theme that can be read from 10 meters away; if the public doesn't understand it as it passes, the visual effort won't pay off.
The actual dimensions. Draw the float in elevation and plan view with detailed measurements. Define length, width, total height with decoration, height of the raised platform, and volumes occupied by participants. A common mistake is to design the float "by eye" and discover during assembly that the exit arch of the route measures 3.80 m and the structure is 4.20 m high.
The materials list. Platform, panels, figures, fabrics, lighting, props. Note prices for each item. Experienced brotherhoods confirm that the decoration budget tends to double compared to the initial estimate, especially for lighting and paint. Add a 25-30% safety margin from the first Excel sheet.
With design, dimensions, and materials finalized, you have the basis to buy the correct trailer without fear of surprises.
Step 2: Approve and register the trailer
If you have chosen a standard approved platform, this step is already resolved at the factory. The trailer arrives with a technical data sheet, a valid ITV card, and a license plate in the buyer's name. You can use it from day one.
If you have opted for a custom or second-hand trailer, the procedures become more complicated. You will need to manage: a technical data sheet from the manufacturer or engineering firm certifying the construction, individual approval if applicable, first in-person ITV, license plate application at the DGT (traffic authority), and registration for the municipal road tax. The entire process usually costs between €400 and €900 and takes 3 to 8 weeks depending on the autonomous community. At Remolque.es, we advise against this route except in exceptional cases: a standard approved trailer saves you paperwork, time, and money.
Important detail: the approved platform does not lose its approval by adding decorations, as long as the decoration does not modify the chassis, original anchor points, position lights, overrun brake, or spare wheel. That is, you can screw, glue, or weld a wooden structure to the upper part without altering the trailer's documentation.
Step 3: Calculate weight and driving license requirements
This is the step that we find incorrectly done 70% of the time. It takes one sheet and five minutes to calculate, but it's skipped in almost all initial projects.
What to add
-
Unladen weight of the trailer (appears on the technical data sheet, ranges between 400 and 800 kg).
-
Complete decorative structure (platform, panels, figures, decoration): 150-400 kg.
-
Participants: 80 kg per person on average.
-
Sound equipment and portable generator: 30-80 kg.
-
Props and accessories: 20-50 kg.
Real example. Three Kings' float with a 6 m platform (unladen weight 570 kg), medium structure (300 kg), 8 participants (640 kg), sound (50 kg), props (30 kg). Total weight 1,590 kg. Recommended PTAC of the trailer: 2,000 kg minimum for a safety margin.
What it means for the license
With a B license, you can tow if either of these two conditions is met: (a) the trailer has an MMA (Maximum Authorized Mass) equal to or less than 750 kg, or (b) the sum of the MMAs of the towing vehicle and the trailer does not exceed 3,500 kg. In our example, the trailer has an MMA of 2,000 kg. If your car has an MMA of 1,800 kg, the sum is 3,800 kg. This does not fall under a B license. You need a B+E.
Common pitfall
"Since the float only goes 20 km/h in the parade, the license doesn't matter." Yes, it does. On the way from the garage to the starting point, you drive on open streets, usually with municipal bike patrol, and any inspection will detect the infraction. Fines between €200 and €500 plus loss of license points. About 8% of municipal parades publish a note each year reminding about this point due to real incidents from the previous year.
Practical solution
If the team doesn't have anyone with a B+E license, there are three options: (1) lower the trailer's PTAC to 750 kg with a smaller platform, adapting the scenery; (2) rent a towing van with a low MMA so that the sum fits within 3,500 kg; (3) train a team member for the B+E license (about €400 for academy and exam, valid for life).
Step 4: Assemble the structure on the trailer
With the trailer approved and the weight controlled, you move on to the visible part. The structure is what supports the decoration and the participants. It cannot be improvised.
Raised platform. Between 20 and 40 cm above the trailer floor. It provides visual volume and allows wiring to be placed underneath. It is built with 7x5 cm pine battens or light steel profiles. 18 mm marine plywood for the floor, secured with through-bolts to the profiles, not to the trailer sheet metal.
Anchors to the trailer. The trailer floor already has factory holes (or rings) for tying down loads. Use them whenever you can. If you mount the platform directly to the trailer floor, it should be with removable screws, not welding: welding compromises the galvanization and can invalidate the warranty.
Perimeter railings. Mandatory in most municipal ordinances. Minimum height 80-90 cm. They can be made of steel, aluminum, or wood with fire-retardant treatment. They must be able to withstand the weight of a participant leaning on them, meaning lateral resistance must exceed 150 kg at any point.
Decorative structure. Panels, arches, figures. Anything higher than 2 m must have double fastening (screw + tensioner or cable). The wind of a parade at 10 km/h, with occasional gusts, is stronger than it seems from the ground.
Electrical lighting. 12 V LED lights powered by a marine battery or a silenced generator. Wiring in a conduit, connections in a waterproof box. Never with exposed household power strips. Always install an accessible master switch for the float leader.
Sound. Speakers securely fixed (minimum two anchor points), amplifier with overheating protection and power limiter to not exceed the decibels authorized by the city council (usually 90 dB at 1 meter).
Step 5: Decorate the float
Decoration is what is seen. If the previous steps are correct, you have free rein here. Here are some criteria that work for the "peñas" (social clubs) we advise.
Legibility from a distance. The public looks at the float for 10 seconds as it passes. Use saturated colors, strong contrasts, and large figures. Fine details are lost beyond 3 meters.
Human scale. Main figures should be at least 1.60 m tall to be read at the scale of a costumed participant. Heads and hands can be exaggerated up to 150% to enhance visibility.
Wind and rain-resistant materials. Expanded polystyrene with a resin layer and acrylic paint withstands an afternoon parade better than traditional papier-mâché. Metallic finishes attract attention but lose their shine in a few hours.
Lighting consistent with the theme. Warm lights for Three Kings' Day parades (magical evocation), cool and strobe lights for Carnival (festive energy), polished and constant lighting for processions (ceremonial respect).
Balanced visual weight. If all the decoration is accumulated at one end, the float looks unbalanced and compromises driving. Distribute volumes symmetrically or intentionally asymmetrically, never "just because it fit."
Step 6: Review safety and documentation before the parade
Between 48 and 72 hours before the event, go through this checklist. It's not paranoia: it's what separates a beautiful parade from an accident that makes the local news.
-
6 kg ABC dry chemical extinguisher on board, secured and accessible.
-
Specific liability insurance for the event (€30-80 depending on coverage).
-
Basic first aid kit in the tractor cabin and another small one on the float.
-
Lighting test with the battery charged to 100%.
-
Sound test at the level you will use in the parade.
-
Fixings for all figures and the general structure. Every bolt, every tensioner, every cable.
-
Trailer and tractor vehicle registration documents on board.
-
Valid trailer inspection (ITV). Photo on the float manager's phone.
-
Driver's license for the driver and at least one substitute.
-
List of participants with contact phone numbers.
-
Total height check with a long measuring tape; compare it with the lowest point of the route.
Step 7: On the day of the parade
Arrive at the meeting point 90 minutes before the official start time. Never less. Timings always get out of sync, and arriving with a buffer prevents last-minute improvisation.
Recommended routine:
-
Assembly of final decorative elements and figures (those not already in place).
-
Final sound and lighting test.
-
Participants board the float. Safety reminder: no jumping, no getting off while moving, sides are not to be used as steps.
-
Briefing: pace, greetings, prohibited gestures, emergency signal from the float manager.
-
Float registration at the exit control with prepared documentation.
-
Warm up the tractor vehicle engine 5 minutes before starting.
During the route, the driver maintains a safe distance from the preceding float (at least 5 meters), a constant speed between 5 and 15 km/h, and pays attention to local police signals. In case of an incident (dizzy participant, electrical failure, loose fastening), the float manager activates the agreed signal, and the driver stops in a safe place, not in the middle of a turn.
At the end of the parade, the float returns to base with the same driving criteria. Complete dismantling usually takes 2-3 hours for an average float and should be done the same day to prevent theft and damage. The approved platform, once the set is dismantled, is ready for other uses throughout the rest of the year.
Common mistakes when building a float from scratch
We compiled these after hundreds of conversations with brotherhoods, social clubs, and committees. Avoiding them saves you money, time, and conflicts.
Choosing the trailer at the end, not the beginning. Designing the float on paper without knowing what GVW (Gross Vehicle Weight) you'll have available leads to set redesigns three weeks before the parade. Decide on the base first, then the set design.
Buying the cheapest trailer without verifying approval. A €1,500 used trailer can end up costing €3,500 with inspection (ITV), paperwork, and tune-up. And it might still not pass on inspection day.
Not calculating the actual weight until the day before. The junkyard or municipal scale is often the first time a whole float is weighed. If you then find you exceed the MMA (Maximum Authorized Mass), there's no room for maneuver. Calculate weight during design, not at the end.
Ignoring municipal ordinances. Every city council has its parade regulations: heights, railings, fire extinguishers, insurance, distances of participants from the edge, prohibition of candy at certain heights. Requesting the regulations from the organizing city council in the first month of the project avoids having to redo entire sections later.
Decoration that doesn't withstand the wind. Paper glued with silicone, unsecured figures, balloons that come loose. A moderate gust of wind can send decorations into the crowd. Besides being dangerous, it's the kind of viral video no one wants to be part of.
Lighting connected with a household power strip. We see it every year. A €3 power strip hanging on the side powers ten meters of LEDs. If it rains, the circuit breaker trips (if there is one) or the metal structure becomes electrified. Use a 12V battery with waterproof wiring or a generator with professional installation.
Not rehearsing with all participants. The float is built, decorated, sound is tested, but there's no full rehearsal with everyone on board. On the day of the parade, it turns out that participants bump into a side panel or the platform gives way where everyone is dancing at once. A 30-minute full rehearsal two days before detects 80% of these problems.
Forgetting specific insurance. The trailer's road insurance does not always cover liability as a parade float. Many city councils explicitly request it at the exit control. Contract it 4 weeks in advance.
Estimated budget for building a float from scratch
For a new, medium-sized parade (6-meter float, 8 participants, medium decoration), this is a breakdown we use with social clubs and brotherhoods starting out:
|
Item |
Range |
|---|---|
|
Approved platform (Flat Platform 6 m) |
€4,500-€5,500 |
|
Decorative structure (platform, panels, railings) |
€900-€1,800 |
|
Figures and props |
€800-€2,500 |
|
LED lighting + marine battery |
€300-€700 |
|
Portable sound equipment |
€250-€600 |
|
Event-specific liability insurance |
€30-€80 |
|
B+E license (driver training if not available) |
€300-€500 |
|
Contingencies (15% margin) |
€700-€1,500 |
|
TOTAL first edition |
€7,780 – €13,180 |
The most expensive item is the platform, but it pays for itself in 15-20 years and allows the budget for subsequent editions to be reduced to €1,500-€3,000 (decoration, props, and consumables only). Thinking of the project over 5 years instead of 1 year completely changes the decision on the base.
Frequently Asked Questions
Can a new "peña" afford a float from scratch?
Yes, if it's considered a multi-year investment. A "peña" that participates for 3 consecutive years easily amortizes the approved platform (the second and third editions cost less than 30% of the first). There are also regional and municipal grants for brotherhoods and cultural associations. Consult your city council and your autonomous community's official gazette.
How long does it take to build a float?
From idea to parade, between 3 and 6 months if it's the first year. Experienced "peñas" reduce this period to 2-3 months because they already have the approved base and some decorative elements. Dedicating weekly sessions of 3-4 hours for 8-10 weeks is usually enough for a team of 6-10 people.
Can I use the same trailer for other things the rest of the year?
Yes, especially if you choose a detachable platform. Between parades, it can be used to transport materials for fairs, furniture for events, moving decorations, association logistics, or even occasional rental to third parties. This amortizes the investment faster and provides profitability outside of the parade month.
What happens if it rains on parade day?
The municipal ordinance determines the decision to suspend. If the parade proceeds, the float must withstand it. Waterproofed materials, lighting with a minimum IP65 protection rating, non-slip platforms, and participants with appropriate footwear. Preparing a "rain plan" in the original design avoids last-minute improvisations.
Do I need specific insurance for the float?
Yes, in addition to the trailer's road insurance. A specific event liability insurance covers third-party damages during the parade (falls, injuries from decoration, damage to urban furniture). It costs between €30 and €80, and many city councils require it at the exit control.
What materials are best for float figures?
High-density expanded polystyrene with an epoxy resin layer and acrylic paint is the current standard. It resists wind, moderate rain, and handling. Papier-mâché looks better aesthetically but degrades quickly. Fiberglass is the premium option, more expensive but reusable for many editions.
Does the float have to be dismantled after the parade?
It depends on the plan. If the set design is salvageable, dismantle it and store it for the next edition. If it's single-use decoration (paper, sun-damaged fabric), remove and recycle it. The approved platform always returns to its general use once the decorative assembly is removed.
What help does Remolque.es offer to those starting a project from scratch?
Arnaud, our specialist, directly advises brotherhoods, "peñas," and city councils that are building their first float. He assesses the event, the target size, the budget, and the team's driving limitations, and suggests the appropriate platform model. We also process financing for associations and companies for up to 60 months.
Conclusion
Building a parade float from scratch is a project that involves design, light engineering, administrative procedures, budgeting, and teamwork. The piece that holds it all together is the approved base. Choosing it well in the first month of the project saves months of problems at the end.
If you're starting your brotherhood's, "peña's," or committee's parade project and want to discuss it with someone who has been through this hundreds of times, Arnaud is just a WhatsApp message away. In a 15-minute conversation, we can tell you which trailer fits, what realistic budget you're facing, and what mistakes to avoid from the very first step.